
How It Works
One collector per site. One platform for everything.
Agentless by design
Instead of installing software on every PC and server, you place one small collector at each customer site. It polls devices over WinRM (Windows), SSH (Linux and macOS) and SNMP (network gear), reads your vCenter, Hyper-V, Proxmox and KVM hosts, receives SNMP traps and NetFlow, and reports back to the platform. Internet-facing systems and cloud accounts are checked directly by the platform.
- Enroll a collector with a one-time token
- Runs on Windows or Linux (systemd), such as a spare PC, VM or NAS
- Self-contained binary, no Python needed on the host
- Push-install additional collectors remotely
- Self-update that is watched and can be put back
- Optional check-in helper for laptops that leave the network
Get running in five steps
-
Create the tenant
Add the customer and their sites.
-
Enroll a collector
Generate a token and run the installer.
-
Add devices
Discover them on the LAN, import them from NinjaOne, Datto RMM, ConnectWise Automate or a spreadsheet, or add them manually.
-
Monitor
Apply monitors and templates, then let alerts and tickets flow.
-
Automate
Attach a script or a runbook to an alert and let routine problems fix themselves.
Every connection explains itself New
Wherever a page can be set up with more than one vendor, a link for each vendor opens numbered steps: what to create in that vendor’s console, what to allow (read-only wherever possible), and which box on the page each value goes into. Policies and settings to paste have a Copy button.
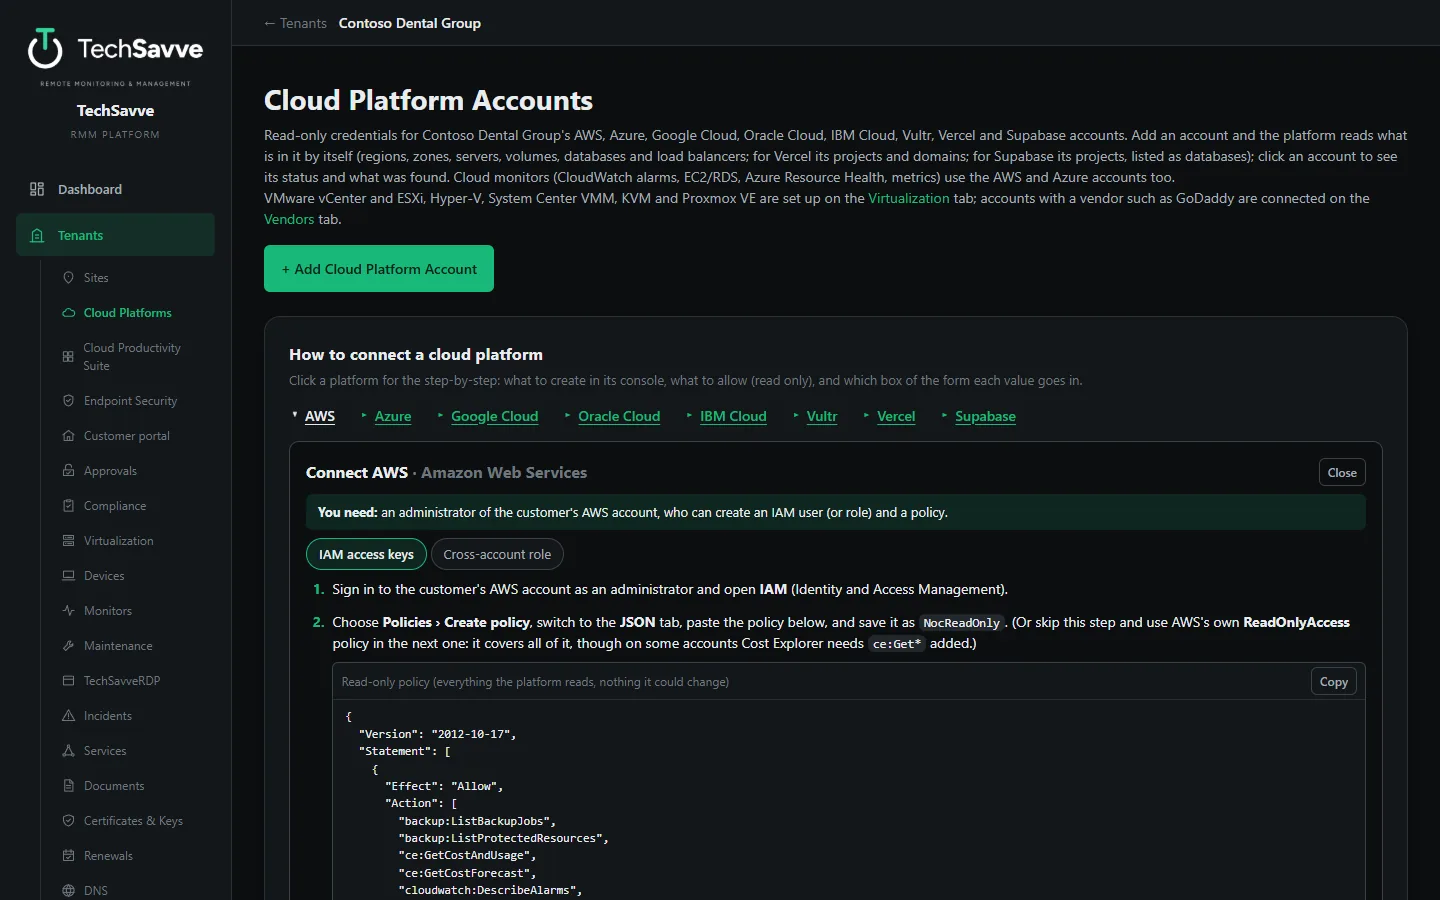
New. The steps are written from each vendor’s own documentation, and consoles change their menus, so tell us if one is out of date.
Moving from another RMM New
The Getting started page imports your customers, sites, devices and credentials, then walks you through a first-week checklist that ticks itself as you go.
From a spreadsheet or your current tool
Upload a CSV, or connect NinjaOne, Datto RMM or ConnectWise Automate. The API key is used once to read your data and is never stored.
A preview first
See what will be created or filled in before anything is written. Customers are matched by name, devices by hostname or serial, and a second run only fills blanks.
Credentials go where they fit
A credentials file assigns the most specific row to each device, and only to devices whose operating system suits the method.
A first-week plan
Twenty-three steps over six days, worked out from the real state of your setup so each one ticks itself as you finish it.
New. The CSV import is tested end to end. The NinjaOne, Datto RMM and ConnectWise Automate connections are new and were tested against recorded answers, not live accounts.
Related guides
Onboarding a new MSP customer: a checklist
What to do in the first 30 days with a new managed services customer: discovery, access, documentation, monitoring, backups, security baseline and the first review.
Agentless vs agent-based RMM: how they differ and when each fits
How agent-based and agentless RMM monitoring work, where each is stronger, the security trade-offs, and how to choose for your customers.
Self-hosted vs cloud RMM: what MSPs should weigh
Where your customers' data lives, who keeps the platform running, security, cost and network reach: the questions to answer before choosing a self-hosted or cloud RMM.
See TechSavve RMM in action
Book a free demo with the DFWTechPros team.